Use Adobe’s Neural Filters to make smarter adjustments. Colorize black-and-white images, capture skin tones correctly, and conduct style transfers in only a few clicks.

Adobe’s artificial intelligence (AI) and deep learning algorithms can now enhance images in ways that were previously difficult or impossible to achieve, they allow creators to quickly and easily apply a wide variety of image effects and adjustments, such as adding artistic styles, changing facial expressions, removing objects from the image, and more.
One of the reasons why Neural Filters are so awesome is that they can generate high-quality results that look natural and realistic. They are trained on large datasets of images, which allows them to learn and mimic the patterns and textures of real-world objects and scenes. As a result, the filters can make subtle adjustments to an image that enhance its appearance without making it look overly processed or artificial.
Located under the Filters tab in Adobe Photoshop, Neural Filters are a fun and easy way to create compelling adjustments and speed up your image editing workflows. Powered by artificial intelligence and machine learning engine ‘Adobe Sensei’, Neural Filters use algorithms to generate new pixels in your photos. This allows you to add nondestructive edits and explore new creative ideas quickly, all while keeping the original image intact.
“Machine learning can help you do a lot of things that would have taken many steps in the past, in some cases, with just one click. In other cases, it gets you 80% of the way there.”
photo editor Jesús Ramirez
The different types of Neural Filters.
Skin Smoothing.

Brush and touch up your subjects’ skin effortlessly with the Skin Smoothing filter. Simple sliders for Smoothness and Blur allow you to remove tattoos, freckles, scars, and other elements on faces and skin in an instant.
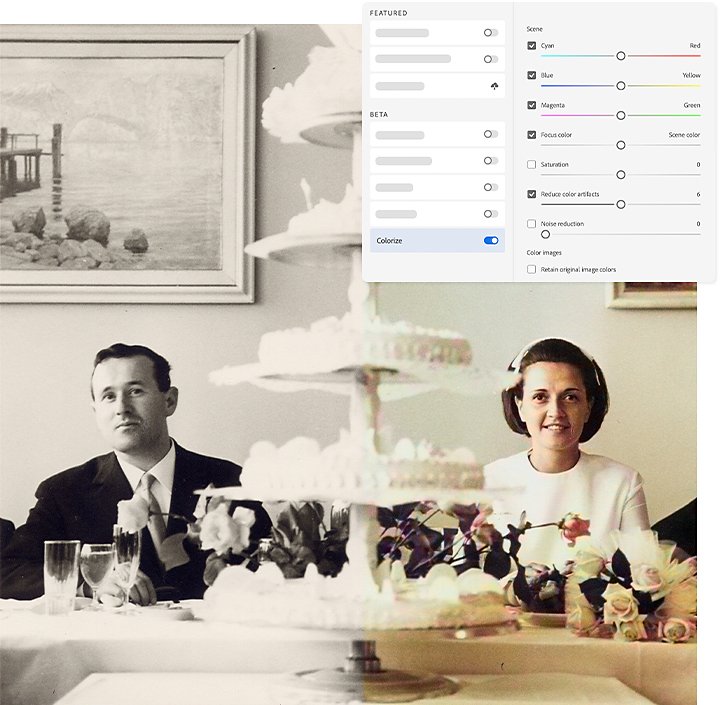
Colorize

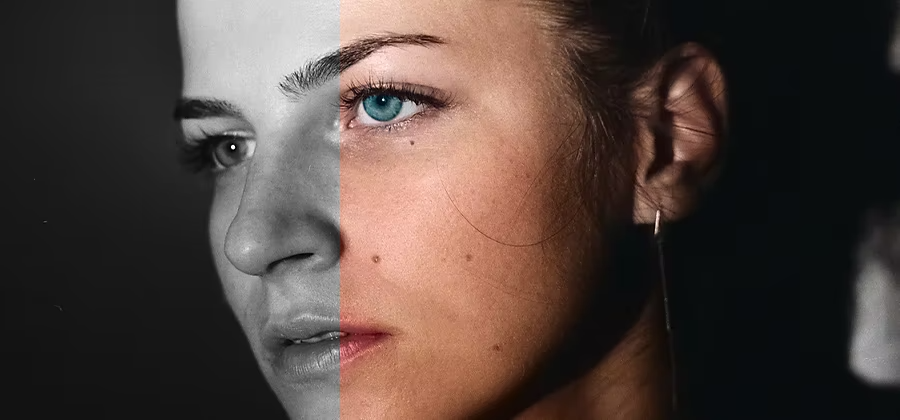
Quickly convert black-and-white photos to eye-popping color in a flash. Designate which colors you want to appear in your capture, the filter will automatically fill the image. Focus points let you add more color to specific areas to fine-tune the filter.
Smart Portraits

Alter your subject’s expressions, position, facial age, and any other small characteristics with the movable sliders in this filter.Create and customize masks to place on your subject to make minor tweaks to appearance or even craft surreal moods. With the Retain Unique Details slider, keep what makes your subject stand out in the midst of all the adjustments.
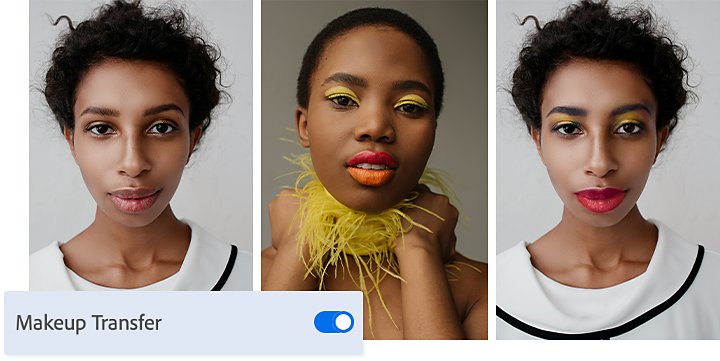
Makeup Transfer

Apply the same makeup settings to various faces with this useful tool. Add new makeup to a photo or completely change your model’s current makeup in post-production to get exactly the right look for your shot.
Depth Blur

Add haze to your photo automatically. Mask out the foreground, add a layer of haze, and adjust accordingly. Use the ready-made sliders in Photoshop to tone up or down the amount of haze, as well as its color temperature, tint, saturation, and more.
Landscape Mixer

Bring the best of two images together to create totally unique landscapes. Start with your landscape photo, then choose a reference landscape shot. Landscape Mixer will pull elements from both photos to create a new image. Use the Winter, Spring, Summer, Fall, and Sunset sliders to control the appearance of the time of day and season.
Color Transfer

Pour gorgeous colors from one photo to the next in just a few seconds. Use Color Transfer to apply the color palette from any reference image onto the photo of your choosing. Play with infinite reference photo options, experiment with color moods, and breathe new life into old photos.
Harmonization

Match the look of one Photoshop layer to another for natural-looking photo compositing. The Harmonization filter looks at your reference image and applies its color and tone to any layer. Adjust the sliders, add a mask, and enjoy the color harmony.
Super Zoom

Quickly zoom in and crop an image with the Super Zoom filter, then let Photoshop add detail to compensate for the loss of resolution.
Style Transfer

Explore new looks to your imagers with the Style Transfer filter. This filter applies selected artistic styles to your images, sparking new creative ideas.
Make the most out of Neural Filters.
When applying a Neural Filter, make sure to always add a duplicate layer on your image to preserve the original source image.
If your filters are meant for your subject’s face, implement a layer mask manually for smoother blending between layers. “Sometimes the filter just overlays pixels, and they don’t look as good on top of the original image, You can definitely do it by hand in some instances and you probably get better results.”
Before you make any changes, see what they would look like on your image with the Preview button. Or if you don’t like the direction your photos take with filters on, click Reset and start over again.
Photo Restoration

Last but not least is Photoshop’s AI trained model that can assist in restoring old or damaged photographs. Using the Photo Restoration filter, users can restore the quality of their images using the basic editing options or choose to further refine using our advanced options (adjustments). Once complete, there is always an option to export the image to the main Photoshop workspace for further refinement.

To access the filter, go to File > Neural Filters > Photo Restoration and switch the toggle to “on”. This will initiate the filter download and activate it for use.
The creators of Photoshop are dedicated to enhancing the software’s power and intuitiveness by introducing new AI features, beta versions, and neural filters. These updates aim to provide users with tools and techniques that can truly help them achieve their creative vision with greater ease and efficiency, resulting in higher-quality work. Look out for more amazing ‘Adobe Sensei’ generative AI features to be included inside all your favorite Adobe products.
Try Adobe Photoshop for free here: https://www.adobe.com/uk/creativecloud/business/teams.html
